Yoghurt Maker

Although you can buy specialist yoghurt-making machines, they can be too small if you consume lots of yoghurt each week, so why not make your own?
Wiring Diagram
The yoghurt maker's circuit consists of three main elements: voltage control, a thermo sensor and status LEDs.
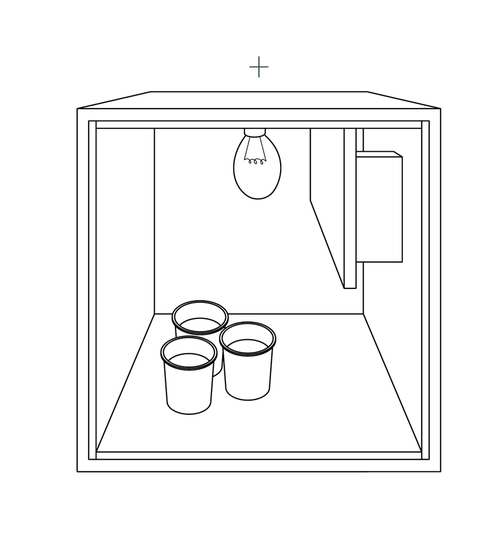
Step One: Build Your Enclosure
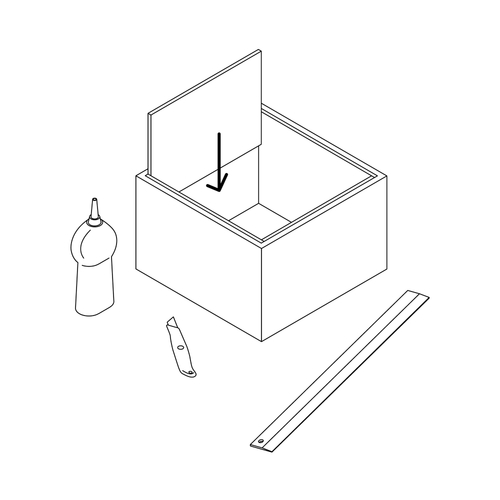
You can build any enclosure you like, but it needs to be insulated with polystyrene.
The prototype for this project was simply a large, polystyrene box, which was both enclosure and insulator. However, this version is made of wood with polystyrene sheets cut to size glued into the box to insulate it.
Step Two: Add a Lamp
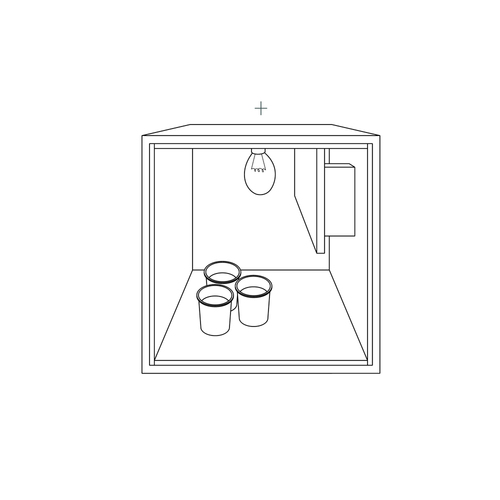
The heat source is a regular light bulb mounted inside the box (it's important that this is a tungsten/halogen bulb that runs at a warm temperature).
A low-wattage bulb in the region of 25W is perfect for this project, as more powerful bulbs can run too hot.
Make a hole in the side of your enclosure for the lamp's power supply cable to pass through.
Step Three: Wire Up the Voltage Control
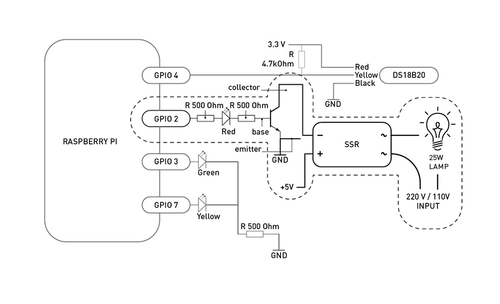
The project requires the lamp to be turned on and off to maintain a constant temperature of 38°C inside the box.
However, a 25W lamp cannot be switched on directly by the 3.3V output of a Raspberry Pi, so we're using a solid state relay (SSR).
As the SSR requires 5V, and the Pi delivers 3.3V, an additional transistor is used to 'amplify' the power from the GPIO.
As this stage is dealing with high-voltage current (220V/110V for lamp), have someone check over your wiring if you are in any way unsure about what you are doing.
Step Four: Connect the Thermo Sensor
The temperature inside the yoghurt maker is measured using a thermo sensor, which is connected to a 3.3V feed, ground and a GPIO pin on the Raspberry, as shown here.
Step Five: Add Status LEDs
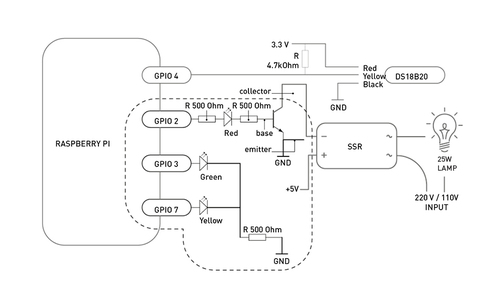
In this build we're adding three LEDs to provide us with simple feedback: red LED indicates that the heating is switched on; a green LED shows that the temperature is within the correct range; and a yellow LED indicates the temperature is too high. Total, ten parts need to be soldered on the breakout board.
Step Six: Sensor Support

You need to add support for the thermo sensor by adding the following line to /boot/config.txt
You can edit this file with Nano by running sudo nano /boot/config.txt Once the file is open, scroll to the bottom and type the following code:
dtoverlay=w1-gpio
Reboot your Pi using sudo reboot and Nano. Copy the code available here and save it as thermostat.py
You will also need the code available here, which you should save to your Pi as readTemperature.py
Step Seven: Running Your Yoghurt Maker
The main Python script used to control the temperature in the box is thermostat.py, which can be provided with a single target temperature, or upper and lower temperature limits.
Every ten seconds, thermostat.py will check the temperature in the enclosure and use the information to switch the SSR on (to active the lamp) and control the diagnostic LEDs. It also writes the status to a log file, which is saved automatically as thermostat.txt
After assembling your yoghurt maker, start up sudo python3 thermostat.py
The red LED should light up to indicate the heating circuit is functioning and the lamp should come on to start heating your box.
After a couple of minutes, the temperature inside the box will have reached 38°C, where it will be maintained while you make your yoghurt.