Box Bot
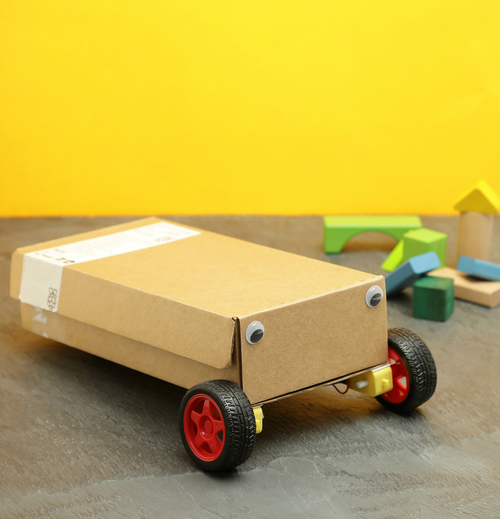
Would you like to make your own simple robot? Then look no further than Box Bot, which is a great introduction to the world of Pi-based robotics.
Note: This project uses a lot of code. Some steps will prompt you to download .txt files of required code, which you may then rewrite or copy and paste.
Step One: Choose Your Chassis

A card box makes a great body for your robot, but you need one with enough space to fit the Raspberry Pi, battery box and wiring.
If you don't want your robot to be tethered, you'll also need room for additional parts.
Step Two: Add Motors & Wheels
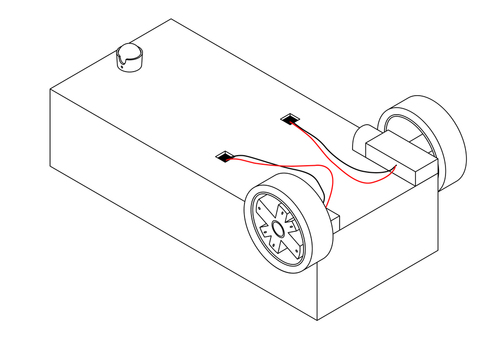
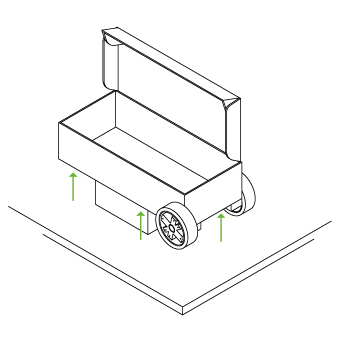
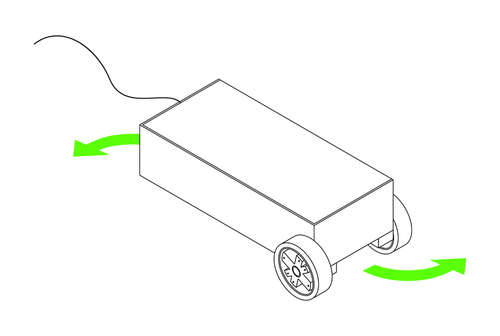
Attach your motors, wheels and ball castor roller to the underside of the box, securing them with doubled sided foam tape. The wheels sit at the front, and the castor wheel at its rear.
Cut two small holes on the underside of the box so you can thread the motor's cables through, as show in the illustration.
Step Three: Connect the Controller Board
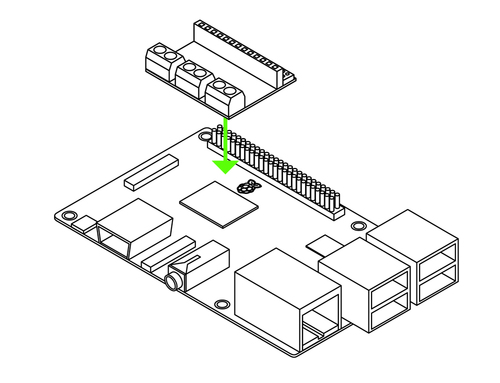
The Motor Controller Board connects to the GPIO pins of your Raspberry Pi 3 as shown.
If you have a different Pi model, with an alternative number of pins, visit the Cambridge Raspberry Jam website for connection details.
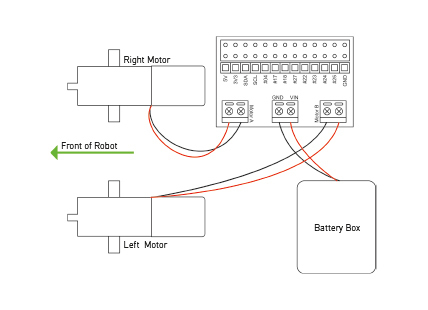
Step Four: Wire It Up
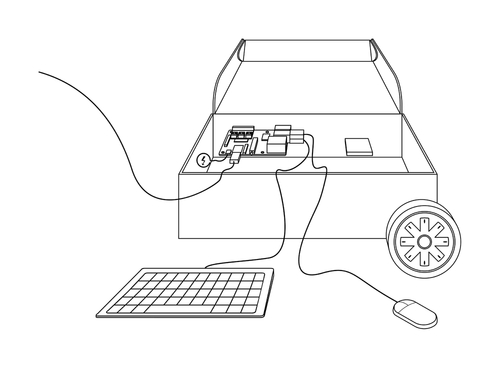
Make sure you have the batteries inserted, but the battery box is turned off. The wires of the battery box must be attached as shown.
Connected your right motor to 'Motor A' on the Motor Controller Board and the left motor to 'Motor B'.
For now, it doesn't matter which way around the motor's wires go.
Step Five: Code the Wheels
The Raspberry Pi's GPIO pins operate the motors. We're using GPIOs 9 and 10 to control Motor A (right side motor) and GPIOs 7 and 8 to control Motor B (left side motor).
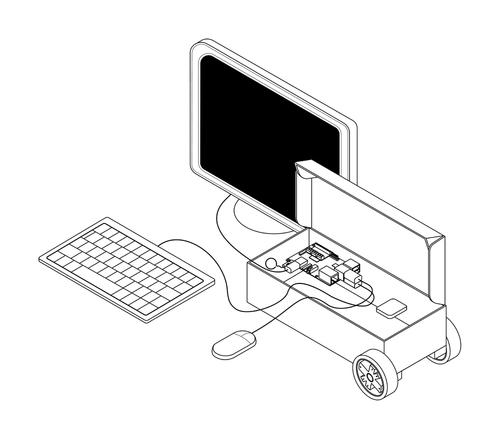
Hook your Raspberry Pi up to a power supply, screen, mouse and keyboard, and enter the following commands into a terminal window to make a directory for all your code for the robot:
cd ~ mkdir EduKitRobotics cd EduKitRobotics
Then, type nano 3-motors.py to create a new Python script in the Nano editor. Now, enter this code. When you've entered the code, press Ctrl + X then Y, followed by Enter to save the file.
Step Six: Test the Wheels
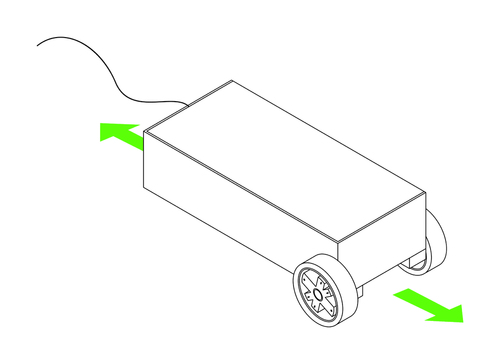
With your fledgling robot still connected to the mouse, keyboard and screen, turn on the battery box. Support your 'bot so its wheels are off the ground and enter sudo python3 3-motors.py in a terminal window to run your Python script.
Both wheels should run forwards one second. If either wheel is turning the wrong way, simply swap the two wires connecting the problem wheel's motor to the Motor Controller Board.
Once both wheels are running correctly you've got a robot that can drive forwards in a straight line!
Step Seven: Add Direction
Each of your motors uses two GPIO pins on your Raspberry Pi. Turning those pins on and off in different combinations will enable your robot to move forwards, backwards, left and right.
Get ready to create a new Python script in Nano by entering the Following into a terminal window:
cd ~/EduKitRobotics nano 4-driving.py
Enter the following code. Again, when you are done, press Ctrl + X then Y, followed by Enter to save the file.
Enter the following in a terminal to run the code (your robot won't move, but it will check the code for errors):
sudo python3 4-driving.py
Step Eight: Add Movement
To move your robot, you need to edit the code you entered in the previous step. Add the following lines, just before the last line of the code, which reads GPIO.cleanup():
Forwards()
time.sleep(1)
Backwards()
time.sleep(1)
StopMotors()
Now, run the script again using python3 4-driving.py
Your robot will move forwards for one second and then backwards for one second.
Make sure your Raspberry pi's power supply cable is long enough to allow your robot freedom of movement!
Step Nine: Take Control
You'll need to adapt the code again to add left and right control. Add your driving.py code which can be found here.
Run the code again (using Python3 4-driving.py) and your robot should take a snaking journey across the floor.