Blinking LED
If you can make an LED blink, you will have demonstrated that you understand the fundamentals of electronics.
It will also give you the opportunity to explore simple circuits and coding.
Step One: Set up Your Pi

You'll need your Raspberry Pi ready to go, with a keyboard and screen attached and the Raspbian operating system installed.
Keep your Pi powered down for now.
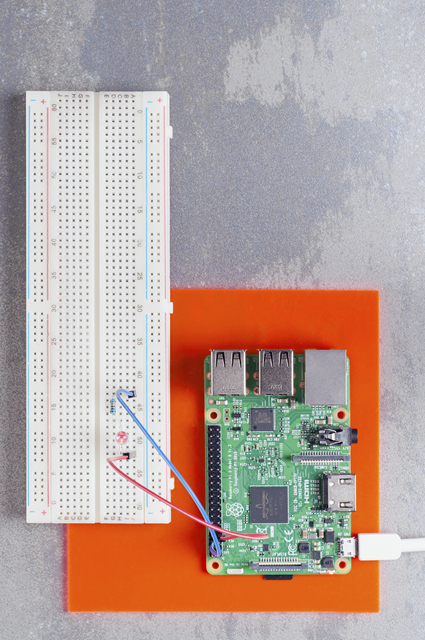
Step 2: Make the Circuit
 |
|
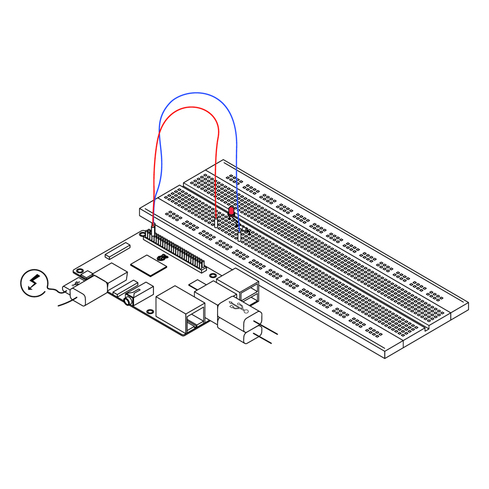
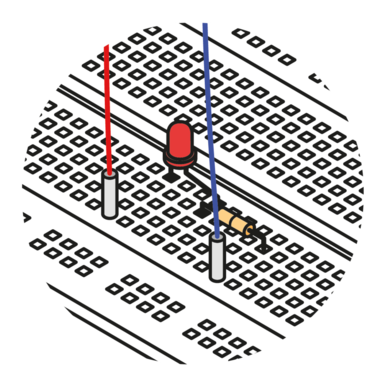
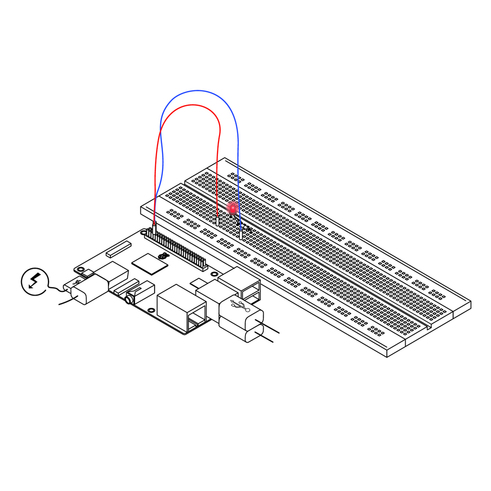
Take your breadboard, wires, LED and resistor, and connect them together as shown.
If you stick something in the wrong hole, just pull it out again. That's the point of electronics breadboards they provide you with a 'reusable circuit board' that allows you to experiment, learn, prototype and make mistakes!
Step 3: Locate Your Pins

1. +3V3
3. GPIO 2/SDA1
5. GPIO 3/SCL1
7. GPIO 4
9. GND
11. GPIO 17
13. GPIO 27
15. GPIO 22
17. +3V3
19. GPIO 10/MOSI
21. GPIO 9/MISO
23. gpio 11/sclk
25. GND
27. GPIO 0/ID_SD
29. GPIO 5
31. GPIO 6
33. GPIO 13
35. GPIO 19/MISO
37. GPIO 36
39. GND
2. +5V
4. +5V
6. GND
8.TXDO/GPIO 14
10. RXDO/GPIO 15
12. GPIO 18
14. GND
16. GPIO 23
18. GPIO 24
20. GND
22. GPIO 25
24. CEO#/GPIO 7
26. CE1#/GPIO 7
28. ID_SC/GPIO 1
30. GND
32. GPIO 12
34. GND
36. CE2#/GPIO 16
38. MOSI/GPIO 20
40. SCLK/GPI0 21
To get your LED flashing you will need to connect it – with your resistor – between a GPIO pin and a 'ground' (or 'earth') pin.
Start by locating a ground pin (GND) and the GPIO 4 pin (sometimes referred to as 'Pin 7').
These pins are where you will wire up your electronics circuit, as indicated above: red is positive, and blue is the 'ground'.
Step 4: Add Your Code

Make sure you have the SD card containing the operating system slotted into your Pi and power it up.
Once it has booted up, click on the computer monitor icon in the Application Launchbar at the top of the screen to open a terminal window.
Type leafpad blink.py to open up a new Leafpad editor window. Enter the following code – which uses the Python programming language – to tell the LED to turn on and off.
import RPi.GPIO as GPIO
from time import sleep
LED_GPIO = 4
print("Getting ready...")
GPIO.setmode(GPIO.BCM)
GPIO.setup(LED_GPIO, GPIO.OUT)
def set_led(state):
if state:
GPIO.output(LED_GPIO, False)
else:
GPIO.output(LED_GPIO, True)
set_led(False)
print("LED is ON")
sleep(2)
set_led(True)
print("LED is OFF")
sleep(2)
set_led(False)
print("LED is ON")
sleep(2)
set_led(True)
print("LED is OFF")
sleep(2)
set_led(False)
print("Turning it on finally…")
GPIO.cleanup()
print("Bye Bye")
Step 5: Testing
Once you have entered the code, exit the Leafpad editor and save when prompted. Go back to the terminal and type: sudo python3 blink.py
You will be prompted to enter a password (unless you changed it, the default password is 'raspberry'). Once the password has been entered, the code will run and your LED will flash.
Congratulations – you've just said 'Hello World' using an LED and a Raspberry Pi!